
Mitsubishi Triton Indicators Not Working: Causes, Checks, and Fixes
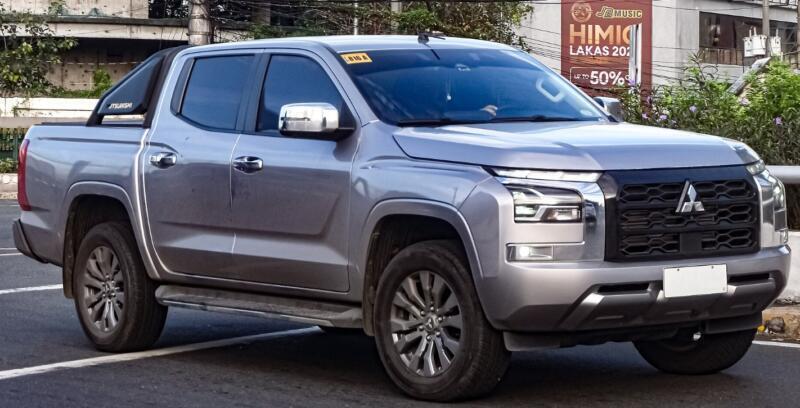
When the indicators on a Mitsubishi Triton stop working, even a simple drive can suddenly feel uncomfortable. Changing lanes becomes stressful, turning at junctions feels unsafe, and every movement on the road requires extra caution.
The good news is that indicator problems are often caused by something relatively straightforward. A blown bulb, damaged fuse, faulty relay, poor earth connection, worn indicator stalk, or wiring issue can all interrupt the system. The difficult part is figuring out which component is responsible.
Because the Mitsubishi Triton has been produced across several generations, the exact fuse locations, relay designs, wiring layouts, and electronic modules can vary. Older models tend to use more traditional relays and simpler circuits, while newer Tritons may integrate indicator control into a body control module.
In this guide, we will walk through the most common reasons Mitsubishi Triton indicators stop working, explain what the symptoms mean, and explore the safest way to diagnose and repair the fault.
- Why Working Indicators Matter More Than We Realise
- Common Mitsubishi Triton Indicator Problems
- Start by Observing the Exact Symptoms
- One Indicator Bulb Has Failed
- Corroded or Loose Bulb Socket
- Blown Indicator Fuse
- Faulty Indicator Flasher Relay
- Hazard Switch Failure
- Worn Indicator Stalk or Combination Switch
- Poor Earth Connection
- Damaged Wiring
- Trailer Wiring Problems
- Aftermarket LED Lights Causing Hyperflashing
- Body Control Module or ETACS Fault
- Water Ingress and Moisture Damage
- Dashboard Indicator Arrows Not Working
- Indicators Work but There Is No Clicking Sound
- Indicators Stay On Without Flashing
- Indicators Work Only With the Engine Off
- Indicators Stop Working When Headlights Are On
- Mitsubishi Triton Indicator Troubleshooting Order
- Step 1: Test Both Sides
- Step 2: Test the Hazard Lights
- Step 3: Inspect All Bulbs
- Step 4: Inspect Bulb Sockets
- Step 5: Check the Fuses
- Step 6: Check the Flasher Relay
- Step 7: Inspect the Indicator Stalk
- Step 8: Check Earth Connections
- Step 9: Inspect Trailer and Accessory Wiring
- Step 10: Scan the Body Electronics
- Useful Tools for Diagnosing the Fault
- Common Mistakes to Avoid
- Can We Drive With Faulty Indicators?
- When Should We Call an Auto Electrician?
- Estimated Repair Difficulty
- How to Prevent Future Indicator Problems
- Mitsubishi Triton Indicators Not Working After Battery Replacement
- Mitsubishi Triton Indicators Not Working After Installing a Bull Bar
- Mitsubishi Triton Indicators Not Working After Rain
- What the Flashing Speed Can Tell Us
- Final Thoughts
- Frequently Asked Questions
Why Working Indicators Matter More Than We Realise
Indicators are easy to overlook until they fail. Most of us use them automatically, almost like blinking. Yet they play a vital role in communicating with other drivers, cyclists, and pedestrians.
Without functioning indicators, other road users cannot reliably predict whether we are turning, overtaking, pulling away, or changing lanes. This dramatically increases the risk of confusion and collisions.
Driving with faulty indicators may also violate roadworthiness or traffic regulations depending on the country. Even when the vehicle remains mechanically drivable, it may not be legally safe to use on public roads.
For that reason, an indicator fault should not be treated as a minor inconvenience. It deserves prompt attention.
Common Mitsubishi Triton Indicator Problems
The phrase “indicators not working” can describe several different symptoms. Identifying the exact behaviour is the first step toward finding the fault.
Common Triton indicator issues include:
- One indicator not flashing
- Indicators flashing faster than usual
- Both indicators completely dead
- Front indicators working but rear indicators failing
- Rear indicators working but front indicators failing
- Indicators working intermittently
- Dashboard arrows not illuminating
- Hazard lights working while indicators do not
- Indicators working while hazards do not
- Indicator lights staying on without flashing
- Indicators stopping after trailer wiring installation
- Indicators failing after rain, washing, or off-road driving
Each symptom points toward a slightly different group of possible causes.
Start by Observing the Exact Symptoms
Before removing fuses or replacing parts, take a moment to observe how the system behaves.
Turn the ignition on and test the left indicator. Then test the right indicator. Walk around the vehicle and inspect every lamp.
Next, activate the hazard lights.
Ask yourself:
- Does one side work normally?
- Does one side flash unusually fast?
- Are the dashboard arrows flashing?
- Can we hear the clicking sound?
- Are all exterior bulbs dead?
- Do the hazard lights operate correctly?
- Does moving the indicator stalk change anything?
- Does the fault appear only when headlights are switched on?
These details can save a lot of time. Electrical diagnosis is often less about guessing and more about following clues.
One Indicator Bulb Has Failed
A failed bulb is one of the most common causes of a Mitsubishi Triton indicator problem.
If only one corner of the vehicle is not flashing, but the other indicators continue to work, the bulb should be the first thing we inspect.
Signs of a Blown Indicator Bulb
Typical symptoms include:
- One indicator lamp remains dark
- The other indicator on the same side flashes quickly
- The dashboard arrow flashes faster than normal
- The indicator relay clicks rapidly
- The warning appears suddenly without other electrical problems
This fast-flashing behaviour is often called hyperflashing. It happens because the indicator system detects reduced electrical resistance after a bulb fails.
How to Check the Bulb
Switch off the ignition and lights before removing the lamp assembly.
Depending on the model year, the indicator bulb may be accessed through:
- The engine bay
- The rear of the headlamp housing
- The wheel-arch liner
- The rear lamp cluster
- A removable trim panel inside the tray or body
Remove the bulb and inspect the filament. A broken filament, blackened glass, or melted base usually confirms failure.
However, a bulb can occasionally look fine and still be faulty. Swapping it with a known good bulb or testing it with a multimeter gives a more reliable answer.
Use the Correct Replacement Bulb
Always use the correct bulb type and wattage. Installing a bulb with the wrong rating can cause rapid flashing, overheating, poor brightness, or repeat failure.
LED replacements can also cause problems if the Triton was designed for conventional incandescent bulbs. Because LEDs draw less current, the vehicle may assume a bulb has failed and produce hyperflashing.
Load resistors or compatible electronic flashers may be required, but poor-quality modifications can create heat and wiring problems. In many cases, standard specification bulbs are the simplest option.
Corroded or Loose Bulb Socket
Sometimes the bulb itself is perfectly healthy, but the socket cannot supply stable power.
This is especially common on work vehicles exposed to dust, water, mud, road salt, and vibration. A Mitsubishi Triton used on farms, construction sites, beaches, or off-road tracks may be more vulnerable to corrosion around the lamp connectors.
What a Bad Socket Looks Like
Inspect the socket for:
- Green or white corrosion
- Burn marks
- Bent contact tabs
- Melted plastic
- Loose terminals
- Water inside the lamp
- Dirt packed around the connector
A corroded socket can create high electrical resistance. The indicator may work occasionally, flash dimly, or stop entirely.
Cleaning the Socket
Disconnect the battery if extensive electrical cleaning is required.
Use electrical contact cleaner rather than household cleaning products. A small nylon brush can help remove light corrosion.
Make sure the contacts are dry before reassembly. If the terminals are badly burned, loose, or heavily corroded, replacing the socket is safer than repeatedly cleaning it.
Blown Indicator Fuse
If both indicators stop working completely, a blown fuse becomes a stronger possibility.
The Triton may use separate fuses for indicators, hazard lights, body electronics, trailer circuits, or related lighting systems. The exact arrangement depends on generation, trim level, market, and model year.
Where Is the Indicator Fuse Located?
Mitsubishi Triton fuse boxes are commonly found:
- Under the dashboard
- Near the driver’s footwell
- Behind a lower trim panel
- Inside the engine bay
- Near the battery
The fuse-box cover usually contains a diagram. The owner’s manual may also identify fuses linked to:
- Turn signals
- Hazard lights
- Combination meter
- Body control module
- Exterior lighting
- ETACS
- Trailer wiring
ETACS refers to Mitsubishi’s Electronic Time and Alarm Control System, which may manage various body electrical functions on certain models.
How to Check the Fuse Properly
Do not rely only on visual inspection. A fuse can appear intact while still having a small internal break.
Use a test light or multimeter to confirm continuity.
If the fuse has blown, replace it only with another fuse of the same amperage. Never install a higher-rated fuse to prevent it from blowing again.
A fuse is a safety device. Increasing its rating can allow the wiring to overheat before protection occurs.
What If the New Fuse Blows Immediately?
If the replacement fuse blows as soon as the indicators are activated, there is probably a short circuit.
Possible causes include:
- Crushed wiring
- Water inside a connector
- Damaged trailer wiring
- Melted bulb socket
- Incorrect accessory installation
- Wire insulation rubbing against metal
- Internal failure inside a lamp assembly
Repeatedly replacing the fuse without repairing the short can damage the wiring.
Faulty Indicator Flasher Relay
Many older Mitsubishi Triton models use a conventional flasher relay to switch the indicators on and off. When this relay fails, the indicators may stop flashing, stay permanently illuminated, or work intermittently.
Symptoms of a Bad Flasher Relay
A faulty relay may cause:
- No clicking sound
- Both sides failing
- Indicators staying on steadily
- Random flashing speed
- Indicators working only after tapping the dashboard
- Intermittent operation when the cabin is hot or cold
- Hazards failing at the same time
The relay may be located near the interior fuse box or integrated into another electrical unit.
Older Versus Newer Triton Systems
On older Tritons, the flasher relay may be a replaceable plug-in component. This makes diagnosis relatively simple.
On newer models, the flashing function may be controlled electronically through the ETACS unit or body control module. In that case, there may not be a traditional relay that can simply be pulled out and replaced.
Before buying a relay, verify that the specific Triton model actually uses a separate unit.
Hazard Switch Failure
The hazard-light switch may seem unrelated to normal indicators, but on some vehicles the indicator circuit passes through or interacts with the hazard switch.
A worn or internally damaged hazard switch can therefore interrupt normal indicator operation.
Clues Pointing to the Hazard Switch
Suspect the hazard switch when:
- Neither indicator works
- The hazard lights behave strangely
- Pressing the hazard button changes the indicator behaviour
- Indicators work only after the hazard switch is pressed several times
- The fault appeared after dashboard work
- The switch feels loose or sticky
Sometimes operating the switch repeatedly can temporarily restore contact, but that is not a permanent repair.
A proper diagnosis may require checking voltage and continuity at the switch connector.
Worn Indicator Stalk or Combination Switch
The indicator stalk is used every time we turn. After thousands of operations, its internal contacts can wear, burn, or loosen.
This is particularly likely when one side works and the other does not, even though the bulbs and wiring appear healthy.
Common Signs of a Faulty Indicator Stalk
Symptoms may include:
- Left indicators work but right indicators do not
- Right indicators work but left indicators do not
- Indicators operate only when the stalk is held manually
- Flashing stops when the steering wheel moves
- The stalk feels loose
- The indicators fail to cancel after turning
- High beams or wipers also behave strangely
The indicator stalk may be part of a larger combination switch assembly that also controls headlights, high beams, fog lamps, or wipers.
Replacing the entire assembly may be necessary if individual internal components are not serviceable.
Can the Stalk Be Cleaned?
Some older switches can be disassembled and cleaned, but this requires care. Small springs, sliders, and contacts can easily be lost or reassembled incorrectly.
For most owners, replacement is more reliable than attempting an internal repair.
Poor Earth Connection
Electrical circuits need both power and a reliable earth path. A poor earth connection can make indicator problems behave in confusing ways.
Rather than simply switching off, the lamps may flash dimly, illuminate other bulbs, or change behaviour when the headlights or brakes are used.
Symptoms of a Bad Earth
Watch for:
- Indicators glowing dimly
- Brake lights flashing with the indicators
- Tail lights behaving strangely
- Indicators failing when headlights are on
- Multiple bulbs glowing at once
- One lamp cluster working unpredictably
- Faults that worsen in wet weather
These symptoms often appear at the rear lamp clusters, where several bulbs may share a common earth connection.
How to Test the Earth
A visual inspection is useful, but a voltage-drop test is more accurate.
With the circuit operating, a technician can measure the voltage between the lamp earth and battery negative. Excess voltage indicates resistance in the earth path.
The repair may involve:
- Cleaning an earth point
- Tightening a loose bolt
- Replacing a corroded terminal
- Repairing a damaged earth wire
- Adding a properly secured replacement earth connection
The metal surface should be clean and free from paint, rust, and dirt where the earth terminal makes contact.
Damaged Wiring
Mitsubishi Triton wiring can be exposed to vibration, heat, dirt, water, body movement, and aftermarket modifications. Over time, wires can crack, rub through, stretch, or corrode internally.
Common Wiring Damage Locations
Pay particular attention to:
- Behind front headlamps
- Around rear lamp assemblies
- Near the tow bar
- Under the tray
- Along chassis rails
- Near battery terminals
- Through tailgate or canopy openings
- Around wheel arches
- Behind dashboard trim
- Near aftermarket accessories
A wire may look intact from the outside while the copper strands inside are broken.
Intermittent Indicator Problems
If the indicators work when the vehicle is stationary but fail on rough roads, wiring movement may be responsible.
Gently moving accessible wiring looms while the indicators are operating can sometimes reveal the fault. However, avoid pulling wires aggressively or probing sealed connectors with oversized test leads.
Trailer Wiring Problems
Trailer wiring is one of the most common causes of lighting faults on pickup trucks.
A poorly installed trailer plug, damaged tow-bar loom, corroded socket, or faulty trailer module can interfere with the Triton’s indicator circuit.
Signs the Trailer Wiring Is Involved
Suspect the trailer system when:
- The problem began after towing
- Indicators fail only with a trailer connected
- The fuse blows when the trailer is plugged in
- Rear indicators stop working
- The dashboard displays a trailer-light warning
- Water or corrosion is visible inside the trailer socket
- Aftermarket wiring has been spliced into factory wires
Disconnect the trailer and retest the vehicle.
If the Triton indicators return to normal, inspect the trailer plug, socket, wiring, and trailer lamps.
Avoid Basic Wire Splicing on Newer Models
Modern vehicles may monitor lighting current electronically. Simply tapping trailer wires into the factory loom can overload the circuit or confuse the control module.
A dedicated trailer wiring module or approved harness is often the safer solution.
Aftermarket LED Lights Causing Hyperflashing
LED indicator conversions are popular because they look sharp and last longer. Unfortunately, they can also cause fast flashing, warning messages, or complete failure.
The issue usually comes from the lower electrical load of LED bulbs.
The Triton’s system may interpret this reduced load as a failed bulb.
Possible Solutions for LED Problems
Depending on the model, the solution may involve:
- Reinstalling standard bulbs
- Using CAN-compatible LED bulbs
- Installing a compatible electronic flasher
- Coding the body control module
- Adding correctly rated load resistors
- Using a dedicated LED conversion kit
Load resistors become very hot and must be mounted safely away from plastic, wiring insulation, and painted surfaces.
Cheap resistors or poor installations can create a bigger problem than the original bulb upgrade.
Body Control Module or ETACS Fault
On newer Mitsubishi Tritons, indicator operation may be controlled by an electronic body module rather than a simple relay.
If bulbs, fuses, wiring, earths, switches, and power supplies all test correctly, the ETACS or body control module may need further diagnosis.
Symptoms of a Control Module Problem
Possible signs include:
- Indicators failing alongside central locking issues
- Interior lights behaving strangely
- Wipers or headlights malfunctioning
- Hazard lights operating unpredictably
- Multiple unrelated electrical faults
- Indicator commands visible on a scan tool but no output
- Fault codes stored in the body electronics system
A control module should not be replaced based on symptoms alone. Module failure is usually less common than damaged wiring, poor connections, blown fuses, or faulty switches.
Why Diagnostic Scanning Matters
A basic engine-code scanner may not access body modules.
A more advanced diagnostic tool may be needed to read:
- ETACS codes
- Body control module faults
- Combination switch inputs
- Indicator output commands
- Trailer module errors
- Communication network faults
Scanning helps determine whether the module is receiving the indicator command and whether it is attempting to operate the lamps.
Water Ingress and Moisture Damage
Water and electronics rarely make good friends.
Tritons used off-road or exposed to heavy rain, pressure washing, river crossings, or canopy leaks may develop moisture inside lamp housings and connectors.
Where Water Can Enter
Potential entry points include:
- Cracked lamp lenses
- Damaged seals
- Loose bulb covers
- Poorly fitted aftermarket lights
- Trailer sockets
- Canopy wiring holes
- Engine-bay fuse boxes
- Dashboard leaks
- Windscreen seal areas
Water can produce corrosion, short circuits, intermittent faults, and blown fuses.
Drying the connector may restore operation temporarily, but the leak must also be repaired.
Dashboard Indicator Arrows Not Working
Sometimes the exterior indicator lights work correctly, but the dashboard arrows do not illuminate.
This may indicate a problem with:
- Instrument-cluster LEDs
- Cluster wiring
- CAN communication
- ETACS output
- Instrument-cluster power supply
- Internal cluster electronics
On older Tritons, the instrument cluster may use replaceable bulbs. Newer clusters often use soldered LEDs.
If both exterior indicators and the audible clicking function normally, the fault may be limited to the cluster.
A cluster repair specialist may be able to replace failed LEDs or repair internal circuit-board damage.
Indicators Work but There Is No Clicking Sound
The clicking sound we associate with indicators was traditionally produced by the mechanical flasher relay. On modern vehicles, the sound may be generated electronically through the dashboard or speaker system.
If the exterior indicators work normally but there is no clicking sound, the problem may involve:
- Instrument cluster
- Warning buzzer
- Interior speaker
- Body control settings
- Software issue
The vehicle may still be roadworthy if the exterior lamps operate correctly, but the missing sound makes it easier to leave the indicators running accidentally.
Indicators Stay On Without Flashing
An indicator that illuminates but does not flash may point to:
- Faulty flasher relay
- Incorrect bulb wattage
- Internal stalk fault
- Shorted wiring
- Body control module issue
- Incorrect LED installation
- Hazard switch problem
On an older Triton with a conventional relay, replacing the flasher unit may solve the issue. On newer models, diagnosis should focus on electronic control, wiring, and system inputs.
Indicators Work Only With the Engine Off
This unusual symptom often suggests a voltage or charging-system issue.
When the engine starts, alternator voltage rises. A weak connection, damaged module, poor earth, or unstable charging system may react differently at the higher voltage.
Possible causes include:
- Loose battery terminals
- Weak battery
- Alternator overcharging
- Poor main earth
- Faulty body control module
- Voltage-sensitive aftermarket accessories
Check battery condition and charging voltage before replacing indicator components.
Indicators Stop Working When Headlights Are On
When indicators fail or behave oddly after the headlights are switched on, a shared earth problem becomes highly likely.
The extra current from the headlights or tail lamps exposes resistance in the earth circuit. Electricity then tries to find another path through neighbouring bulbs.
The result can look like a haunted lamp cluster: dim lights, glowing indicators, flashing brake lamps, or bulbs illuminating together.
Inspect the lamp earth connections and connector terminals carefully.
Mitsubishi Triton Indicator Troubleshooting Order
Working through the system in a logical order helps prevent unnecessary parts replacement.
Step 1: Test Both Sides
Check left and right indicators separately.
Note which exterior lamps work and whether the dashboard arrows respond.
Step 2: Test the Hazard Lights
Hazard-light behaviour helps narrow the fault.
If hazards work but normal indicators do not, the bulbs and much of the exterior wiring may be fine. The problem may lie with the indicator stalk, switch input, or control circuit.
Step 3: Inspect All Bulbs
Check for failed, incorrect, loose, or aftermarket bulbs.
Make sure every bulb matches the required specification.
Step 4: Inspect Bulb Sockets
Look for corrosion, heat damage, water, loose contacts, and melted plastic.
Step 5: Check the Fuses
Use the fuse diagram and test relevant fuses with a meter or test light.
Replace only with the correct amperage.
Step 6: Check the Flasher Relay
If the model uses a separate relay, confirm whether it clicks and receives power.
Swapping it with an identical known-good relay may be useful when appropriate.
Step 7: Inspect the Indicator Stalk
Check whether moving or holding the stalk changes the fault.
A scan tool may show whether the body module receives left and right indicator commands.
Step 8: Check Earth Connections
Inspect lamp earths and main body earth points.
Use a voltage-drop test where possible.
Step 9: Inspect Trailer and Accessory Wiring
Disconnect trailers, canopies, bull-bar lights, alarms, remote-start systems, and aftermarket lighting circuits where practical.
Step 10: Scan the Body Electronics
On newer Tritons, use a suitable diagnostic tool to read ETACS and body-module codes.
Useful Tools for Diagnosing the Fault
A few basic tools can make indicator diagnosis much easier.
Useful equipment includes:
- Digital multimeter
- Automotive test light
- Fuse puller
- Spare correct-rated fuses
- Electrical contact cleaner
- Small nylon brush
- Basic hand tools
- Wiring diagram
- Diagnostic scanner with body-module access
- Known-good replacement bulb
A multimeter is especially valuable because it allows us to check voltage, continuity, resistance, and earth quality.
Common Mistakes to Avoid
Electrical problems encourage guesswork, especially when the fault appears simple. Yet guessing can become expensive.
Avoid these common mistakes:
- Replacing every bulb without testing
- Installing a larger fuse
- Ignoring water inside the lamps
- Assuming a relay exists on every model
- Blaming the control module too early
- Using household wire connectors
- Twisting wires together without proper protection
- Installing random LED bulbs
- Ignoring trailer wiring
- Testing only the dashboard arrows
- Replacing parts without checking power and earth
The best repair is based on evidence, not hope.
Can We Drive With Faulty Indicators?
Driving with non-working indicators is not recommended.
Even if the vehicle still runs normally, other drivers cannot tell what we intend to do. Hand signals may be misunderstood, difficult to see, or unsafe to perform.
If only one bulb has failed, the vehicle should still be repaired as soon as possible. If all indicators are inoperative, avoid driving except where necessary to move the vehicle to a safe repair location.
Road rules differ by country, but functioning indicators are generally considered essential safety equipment.
When Should We Call an Auto Electrician?
Basic bulb and fuse checks are suitable for many owners. However, professional help is sensible when:
- The fuse keeps blowing
- Wiring has melted
- The fault is intermittent
- Trailer wiring is heavily modified
- Several electrical systems fail together
- The ETACS module stores fault codes
- A control module may require coding
- Dashboard removal is necessary
- The vehicle has accident or flood damage
- We are unsure how to test the circuit safely
An experienced auto electrician can trace voltage through the circuit and identify the exact failure point.
Estimated Repair Difficulty
The repair difficulty depends heavily on the cause.
Easy Repairs
These often include:
- Replacing an indicator bulb
- Cleaning a lightly corroded socket
- Replacing a blown fuse
- Tightening an accessible earth point
Moderate Repairs
These may include:
- Replacing the hazard switch
- Replacing a plug-in relay
- Repairing trailer wiring
- Replacing a bulb socket
- Repairing an accessible damaged wire
Advanced Repairs
These may involve:
- Replacing the indicator stalk
- Diagnosing body control inputs
- Repairing hidden wiring
- Removing dashboard panels
- Programming an ETACS module
- Repairing an instrument cluster
How to Prevent Future Indicator Problems
We cannot prevent every electrical fault, but a few habits reduce the risk.
Keep Lamp Housings Sealed
Replace cracked lenses and damaged seals before water reaches the connectors.
Protect Trailer Connections
Use weather-resistant sockets, covers, and approved wiring kits.
Avoid Aggressive Pressure Washing
Do not direct high-pressure water into lamp seams, fuse boxes, trailer plugs, or electrical connectors.
Use Correct Bulbs
Incorrect wattage creates heat and may confuse the indicator system.
Inspect After Off-Road Trips
Mud, branches, water, and vibration can damage wiring beneath the vehicle.
Repair Small Faults Early
A slightly dim bulb or occasional fast flash may be the first warning of a loose connection.
Mitsubishi Triton Indicators Not Working After Battery Replacement
If the indicator problem began immediately after battery replacement, inspect the battery area carefully.
Possible causes include:
- Loose battery terminal
- Forgotten earth cable
- Blown fuse caused by accidental shorting
- Connector disturbed during battery removal
- Body module needing time to reinitialise
- Incorrect battery polarity connection
- Voltage spike damage
Start by checking all battery terminals and nearby fuse links.
Disconnecting the battery may reset some modules, but it will not repair damaged wiring or a failed component.
Mitsubishi Triton Indicators Not Working After Installing a Bull Bar
Bull bars often require changes to front indicator or parking-light wiring. If the indicators fail after installation, the new wiring should be considered the primary suspect.
Check for:
- Incorrect wire connections
- Reversed polarity
- Poor crimp terminals
- Missing earth wire
- LED compatibility issues
- Pinched wiring behind brackets
- Connectors left unplugged
- Water entering aftermarket lamps
A professional installation should use sealed connectors and avoid damaging the factory loom.
Mitsubishi Triton Indicators Not Working After Rain
Indicator faults that appear after rain usually point toward moisture.
Inspect:
- Lamp housings
- Bulb holders
- Trailer socket
- Engine-bay fuse box
- Wiring joints
- Aftermarket light connectors
- Windscreen and dashboard leak areas
Do not simply dry the connector and forget about it. The leak source must be sealed, or the problem will return.
What the Flashing Speed Can Tell Us
The indicator speed acts like a basic diagnostic signal.
Fast Flashing
Usually suggests:
- Failed bulb
- Incorrect bulb
- LED conversion
- Poor bulb connection
- Open circuit
Slow Flashing
May indicate:
- Weak voltage
- Incorrect relay
- High resistance
- Charging-system issue
- Wrong bulb load
No Flashing
May point to:
- Blown fuse
- Faulty flasher relay
- Stalk failure
- Hazard-switch fault
- Body control problem
- Complete power loss
Irregular Flashing
Often suggests:
- Loose connector
- Corrosion
- Worn switch contacts
- Damaged wiring
- Unstable voltage
Final Thoughts
When Mitsubishi Triton indicators are not working, the solution often begins with simple checks. A failed bulb, blown fuse, corroded socket, bad earth, worn relay, or damaged trailer connection can shut down part or all of the system.
The key is to follow the symptoms rather than replacing random parts.
If one lamp has failed and the system flashes quickly, start with the bulb and socket. If both sides are dead, check the fuse, hazard switch, relay, stalk, and body electronics. If the lights behave strangely when headlights or brake lights are used, inspect the earth connections.
Newer Tritons may require a diagnostic scanner because the ETACS or body control module plays a larger role. Older models may be easier to diagnose with a test light, multimeter, and traditional relay checks.
Either way, indicator faults should be repaired promptly. They may seem small, but on the road, they are our vehicle’s voice.
Frequently Asked Questions
Why are my Mitsubishi Triton indicators flashing fast?
Fast flashing usually means the system has detected a failed bulb, incorrect bulb wattage, poor connection, or low-current LED replacement. Check every indicator lamp on the affected side.
Why do my Triton hazard lights work but the indicators do not?
If the hazards work normally, the bulbs, fuse supply, and much of the exterior wiring may still be functional. The fault may be in the indicator stalk, combination switch, control-module input, or related wiring.
Where is the Mitsubishi Triton indicator relay?
The location depends on the model year. Older Tritons may have a replaceable relay near the interior fuse box. Newer models may control flashing through the ETACS or body control module instead of a separate relay.
Can trailer wiring stop the Triton indicators from working?
Yes. A short circuit, corroded trailer socket, faulty trailer lamp, or poorly installed wiring harness can blow a fuse or disrupt the vehicle’s indicator circuit.
Why do my Triton indicators stop working when the headlights are on?
This usually suggests a poor earth connection, especially in a front or rear lamp cluster. The added electrical load forces current through the wrong path, causing dim, mixed, or failed lighting.
This content may interest you! Mitsubishi Triton Heater Not Working: Causes, Diagnosis, and Fixes
Leave a Reply